new jersey landscape design

Lawn & Garden: How To Prepare For Winter

54ca73eb65f89_-_fall-leaves-rake-470-0908.jpg

Landscape Checklist For Winter Preparation

By: Lauren M. Liff for Dabah Landscape Designs

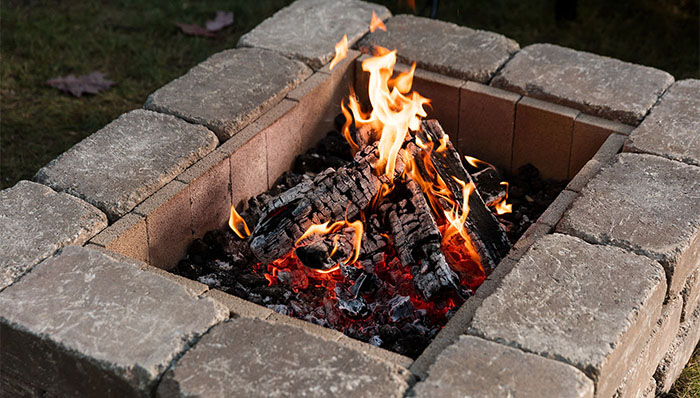
For avid gardeners, it feels as though as soon as the growing season arrives, it’s gone. For the blooms this might be true, but for your landscape as a whole, there is still plenty of time to care for it before it enters its dormant period. Preparing your lawn and garden for the cold weather is incredibly important when it comes to keeping a happy and healthy landscape. There are important tasks to complete in the fall to make sure that all plant materials are ready for that strikingly cold first frost. Take a look at the steps below to help you prepare your garden for dormancy; at the bottom of this post we have our downloadable and printable fall checklist to make your garden prep a breeze.

First you want to assess your garden. Your garden can tell you a great deal upon conclusion of the growing season. To prepare for the next growing season, first you want to assess the results of your work from this season.  Assess the overall health of your plant materials, check for diseases and damage and address accordingly. Next we begin the physical preparation – its time to clean up the garden! You should weed, deadhead faded blooms and replace any ties with jute twine The natural fibers work better over the winter because they are more flexible – they will break down over time but by the time that happens you will be needing to retie your plants anyway.

promo292884385.png

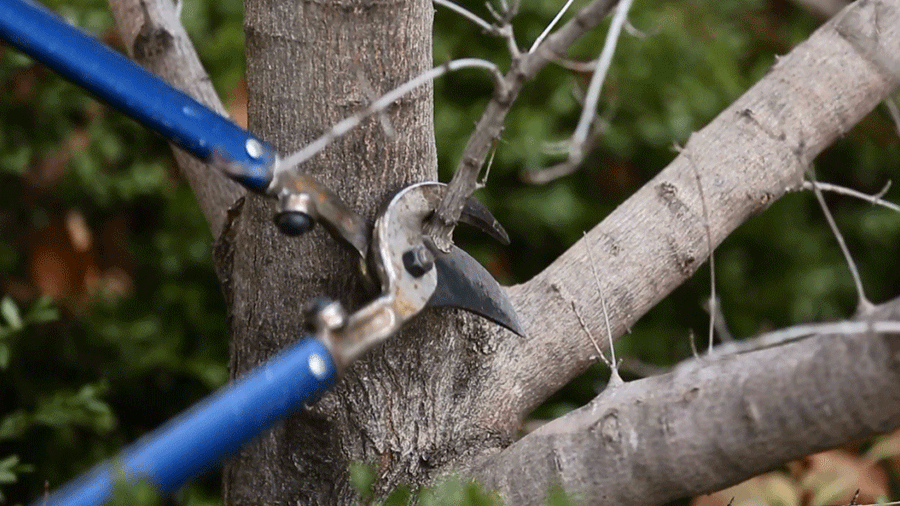
Next you can begin cleaning up your plant material. You can lightly prune dead and broken branches from your trees and shrubs but take care when pruning your flowering plants. Some plants flower on old growth (certain types of hydrangeas for example) so when you prune off the old growth, you’re actually pruning off next years buds. Spent flower heads can be pruned off but if you’re unsure of the pruning methods of a certain plant, it doesn’t hurt to look it up. Then you want to see if any of your plants have outgrown their space in your garden. If so, then they might need to be divided. If you have perennials in containers, you can remove them and trim the roots before planting them in the ground (root pruning will hem stimulate new feeder roots).

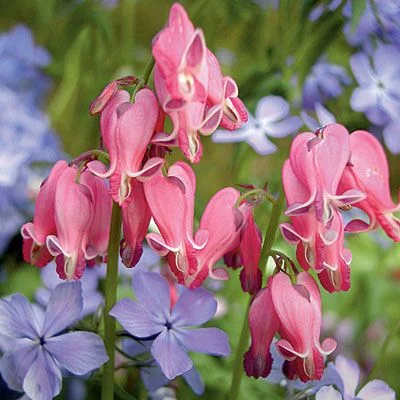
Make sure to remove any annuals or bulbs from your garden that aren’t zone hardy – be sure not to forget your containers and window boxes as well. You can save seeds from your annuals for next year. You can use cool weather annuals in your containers such as kale, pansies or garden mums. You can then add soil to the areas where plants were removed or areas where additional soil is needed. You can add compost and peat moss to replace any lost nutrients from the growing season. Add mulch to needed areas in your garden but make sure it isn’t sitting on low lying branches or pushed up the stalk of a plant.

Laying-down-mulch.jpg

The fall is the perfect time to lay down seed to fill in those bare patches throughout the lawn - the cooler weather will allow them to have a better chance at germinating and developing a strong root system before the freezing temperatures arrive. Aeration will help to break up compact soils and aid in seed germination – the two can go hand in hand. You should also apply your winter fertilizer –a slow release all-natural fertilizer will do the trick. Your lawn can store food in the form of carbohydrates during the winter season, allowing for a healthier and stronger lawn the following season.

If weeds were a concern this season (as they usually are) you can also apply a selective pre-emergent herbicide (like you did in the spring) – this will help deal with weeds that have been deposited during the summer. You can also use a spot treatment of post-emergent herbicide however most people would rather put down grass seed instead. If grass seed as been laid on your lawn do not use any weed control as this will stop the grass seed germination along with the weeds. Make sure you know the difference between selective and non-selective herbicides – a non-selective herbicide will kill everything including your lawn. Lastly, early fall is a great time to plant trees and shrubs. For some plant material suggestions and tips, take a look at our Fall Is For Planting post. Plus, nurseries and garden centers have everything on sale to help clear their shelves for the season.

Following this checklist will help you ease your garden into dormancy and allow for happier, healthier plant materials next season, as well as a cleaner garden! As the days grow shorter and the weather grows colder, gardeners everywhere dream of the upcoming growing season – so take advantage of the time you have left this year to make the most of the 2017 growing season. Come springtime, your garden will be thanking you for your love and care during the previous season. So take this list, check it twice and count the days till spring arrives. Happy gardening!


Download and print our Fall Gardening Checklist


For More Information

When Should You Plant Trees & Shrubs?

Unknown.jpeg

It's True Folks, Fall Is For Planting!

By: Lauren M. Liff for Dabah Landscape Designs

In the world of gardening, there is a huge misconception that the leaves changing color and the temperature dropping signals the end of the growing season. This is false; the growing season doesn’t end until the plants enter their dormant period. What most people don’t know, is that it is actually more beneficial for your trees and shrubs to be planted in the fall as opposed to the spring. Planting your trees and shrubs in the fall gives encourages them to establish a stronger root system before the heat of the next summer.

100032050.jpg.rendition.largest.ss.jpg

Fall technically begins late in September – the best time to plant your trees and shrubs is about six weeks before the first sign of a hard frost. September through November is the perfect time for planting because even though the air is getting cold, the ground is still warm. This allows the root systems to become more established before the dormant period resulting in a stronger and healthier plant for next season. With the cooler temperatures and the increase in precipitation, less watering is required and there is no need to worry about damage from the summer heat. The stable air conditions also allow for rapid root development; rather than focusing all its energy on foliage or flower production, the tree puts its energy into establishing a stronger root system and in storing nutrients for dormancy.

These fall plantings will become better equipped to handle summer heat and drought due to their strongly established root system. From a designer perspective, being able to see a plants fall interest before putting it into the landscape is always a plus. There are some species you should avoid planting in the fall however, broad-leaved evergreens such as rhododendrons, azaleas, boxwoods and hollies require extra care through the winter months. They will need protection from winter winds and should be treated with an anti desiccant. We also recommend that you stick to zone hardy plant material – Schip laurels for example, don’t tolerate winter winds very well at all, the key is to plant them where they can be guarded (for example, as a foundation planting where the house combats the wind).

1452647823537.jpeg

When planting in the fall, there are three things you should keep in mind. Make sure to plant high, the soil will settle leaving your tree or shrub susceptible to root rot or disease. Don’t amend the soil around your new planting – you want to allow the roots of your new tree or shrub to grow into the native soil. With the amended soil, the roots are more likely to experience reduced growth resulting in a smaller root system and a weaker plant. We suggest you break up any clumps in the soil and remove any rocks to allow the root system to travel as it pleases. Make sure to add mulch to your new planting. You can use around 3 inches of mulch or organic matter around your plant. The organic matter should be shredded leaves or ground bark/nuggets. Adding this layer will help protect the root system during the cold weather and allow for better water retention.

If you’re looking to plant a tree this fall, here are some species we recommend: maple, spruce, pine, crabapple, linden, elm, hackberry, hawthorn and honey locust. Planting these trees and shrubs this fall will prove for healthier, happier and hardier plants for the next growing season. Studies show that trees and shrubs planted in the fall, when compared to those planted in the spring, have a more established root system and stronger overall health. A strong root system leads to a strong plant! You should also keep in mind that garden centers and nurseries are trying to clear their stock for the season – who doesn’t love a good discount? 

Happy-gardening.jpg

Garden Labyrinths: A Journey To The Center

2014labyrinth3-87febde0.jpeg

The Wonders Of Garden Labyrinths

By: Lauren M. Liff for Dabah Landscape Designs


        Quite recently a new outdoor trend has experienced a surge in popularity – garden labyrinths. In reality, outdoor labyrinths are not a new trend at all; they have been created all over the world for centuries. A garden labyrinth is an intricately designed maze that is giving landscape design a new spin. These unique and beautiful structures are designed in a wide variety of shapes and out of an endless range of materials. They are viewed as a meditation aid providing a relaxed, calm, serene feeling to anyone who enters.  

1fcf66b534a7583f34baec537e04107a--labyrinth-garden-backyard-retreat.jpg

        A labyrinth differs from a maze in that the intent is not to journey through but to. They are made up of a singular curving pathway leading to a central area meant for meditation and reflection – the walker proceeds along the path as a walking meditation and upon reaching the center, they pause, turn around, and walk back out. These wondrous designs have been around for thousands of years and are used in a number of different fashions ranging from ceremonial purposes to choreographed dances.

        Studies were done by Dr. Herbert Benson at the Harvard Medical Schools’ Mind/Body Medical Institute on the effects and benefits of labyrinths on the human mind. These studies showed that “focused walking meditations are highly efficient at reducing anxiety” and that the effects hold significant long-term health benefits. Walking through a labyrinth can lower your blood pressure and breathing rates, it can reduce incidents of chronic pain and insomnia and aid in improving fertility among a number of other benefits. Labyrinths have been installed in hospitals, health care facilities and spas across the globe because of the amazing health benefits they hold.

        It is said that the garden labyrinth can become a metaphor for the journey of life: we are all on our own individual singular path through life, full of twists and turns, and just like each person’s individual life, every experience and every moment is different from person to person. Labyrinths represent ones’ journey inward to discover ones true self and then the journey back into the everyday world. Walking a labyrinth is a right brain activity – it triggers creativity, intuition and imagination. It can be your own personal tool to clear your mind, release anxiety, aid in transitional periods or provide healing and self-knowledge.

        Garden labyrinths are becoming increasingly popular throughout the world and their styles can be as simple as using a rope to outline the path or as intricate as using detailed stonework and pavers to create the delicate symbol. Labyrinth designs, paver kits, stencils and pre-made pathways can be ordered online or DIY tutorials are readily available as well. Hardscaping ones property normally consists of the usual yet ever popular items: retaining walls, patios, outdoor kitchens or fire pits…why not stand out from the crowd and add a hardscape feature to your property that is truly unique. Building an outdoor labyrinth into your landscape will not only make your property one of a kind, but it will give you a one of a kind experience with every walk you take. 

WilmingtonDE-Montesori-24_Abingdon-pavers-CFRL.jpg
14ed2ecea0c9c11b960335e7537b56bb.jpg

Are You a Good Weed? Or a Bad Weed?

plantain-.jpg

Soil Conditions: Weeds as Indicators

By: Lauren M. Liff for Dabah Landscape Designs


When it comes down to it, any gardener will tell you that there is no such thing as a good weed, and I’m inclined to agree with them. However, the weeds that love to invade your property can actually tell you a lot about your garden. Analyzing the types of weeds that flourish throughout your property can clue you in on the soil conditions of your lawn and garden spaces. With this knowledge, you can make the proper soil amendments and provide a better growing environment for your garden plants as well as your turf.

Improving your soil conditions often can help deter or even eliminate weed growth and when it comes to weed control, taking preventative measures will provide the best results! It makes sense that soil conditions and weed growth go hand in hand. Although there are a vast number of types of weeds as well as a wide range of soil types, we are going to focus on the weeds that are most “popular” and the most common soil types. Let’s see which weeds will help you decipher what soil conditions you have in your lawn and garden.


For wet, moist and poorly drained soils:

- Moss Joe-pye weed

- Spotted spurge

- Knotweed

- Chickweed

- Crabgrass

- Ground ivy

- Violets Sedge 

For soil that is dry sandy:

- Sorrel

- Thistle

- Speedwell

- Garlic mustard

- Sandbur

- Yarrow

- Nettle

- Carpetweed

- Pigweed 

For soil that is hard and compacted:

- Bluegrass

- Chickweed

- Goosegrass

- Knotweed

- Mustard

- Morning glory

- Dandelion

- Nettle

- Plantain 

For heavy clay soils:

- Plantain

- Nettle

- Quack grass 

For Acidic soils:

- Oxeye daisy

- Plantain

- Knotweed

- Sorrel

- Moss 

For alkaline soils:

- Queen Anne’s lace (wild carrot)

- Chickweed

- Spotted spurge

- Chicory 

For Poor/low fertility soils:

- Yarrow

- Oxeye daisy

- Queen Anne’s lace (wild carrot)

- Mullein

- Ragweed

- Fennel

- Thistle

- Plantain

- Mugwort

- Dandelion

- Crabgrass

- Clover

For fertile, well-drained, humus soils:

- Foxtail

- Chicory

- Horehound

- Dandelion

- Purslane

- Lambsquarters 

7caef1e5fef6e0177cc148e8bbfc76a7--gardening-tips-weed.jpg

Perrenial-garden.jpg

It’s easy to identify common weeds using the link listed below or by using research books. Once you are able to identify the weeds that plague your property, you can eradicate these pests and improve your soil. Not only are you improving the growing environment for your turf and plant material, you are improving the over all look of your property. As much as I dislike saying it, there is no true way to win the battle against these weeds. However, these preventative measures and your consistent devotion to your outdoor space will help to lessen their ability to take up space on your property and lessen the competition they bring against your chosen plant material.

Rutgers Weed Gallery


Source

Guide To Working With The Right Landscape Designer: Part 3

Top 4 Questions To Ask About Your New Landscape

By: Lauren M. Liff for Dabah Landscape Designs


Congratulations on your newly installed landscape! You asked the right questions before hiring your landscape designer and you asked the right questions during the project but now that the project has been completed, what’s next? Every landscape design client has questions regarding their new plant material and hardscapes. We believe that there is no such thing as a silly question, so ask away! As landscape designers, we want to see your new design flourish for years to come.  Here are the top questions we recommend you ask regarding your new outdoor space:

Top: Initial Installation, Bottom: 1 year later

Top: Initial Installation, Bottom: 1 year later

1. How long will it take for the garden to fill in? When a new garden is installed, the plant material used seems to look small but there is a reason for that. Designers take into account the mature size of the plant and plan for the space it needs to grow. Each plant has a different growth rate, some ornamental grasses and perennials can grow in within a single season but larger woody material such as trees and shrubs can take some time to fill in. We can say that the year following your landscape installation will absolutely look more incredible than it did when it was first installed. Be sure to ask your designer how long they believe it will take for the areas in your landscape to grow in, that way you will have an estimated timeline.

unnamed.jpg

2. How much maintenance do my new plants require? Different plants require different levels of maintenance and maintenance depends on how much time you are willing to commit to your garden. Some companies offer maintenance services which are at your disposal and if they do not offer those services, you can ask for recommendations. For “the do it yourselfers” make sure to ask about the maintenance requirements for the plant materials used on your property. Proper maintenance and care results in happy, healthy and well-established plants.

unnamed.gif

3. When and how often should I water my new plants? Similar to maintenance practices, watering routines vary from plant to plant. Some like wet feet, others prefer dry soil and some are in between. Request the watering requirements for your plant materials from your designer – this will help to ensure their success going forward. If you do not have an irrigation system, ask if they would recommend having one installed or for suggestions on alternative watering methods. Make sure to ask how often you should water – typically the best time to water your garden and turf is early in the morning and around dusk. New plants do require more water as opposed to plants that are already established.

unnamed-1.jpg

4. How do I handle weeds in my new garden? Weeds are an incredibly common problem in every garden and they can take away from the beauty of the design. You can ask your designer for recommendations on how to control them. From our standpoint, preventative measures work the best – there are pre-emergent weed control applications that you can apply in your garden (organic as well). Although it seems like a lot of work, pulling weeds out as they appear will help to keep your garden in top shape.


Working through a landscape design and installation process can be difficult…but it doesn’t have to be. When it comes down to it, asking the right questions at the right times will make all the difference! Using our simple to follow 3 part guide will absolutely make your project go smoothly and your experience much more relaxing and enjoyable. Being on the same page as your designer, not holding in any questions you might have and gaining knowledge about your landscape will help you to keep your garden in tip top shape for many years to come! 


http://www.foxnews.com/real-estate/2017/04/07/10-questions-to-ask-before-hiring-landscape-designer.html

How to Build Your Own Fire Pit

build-a-fire-pit-hero.jpg

DIY: Building a Fire Pit

By: Lauren M. Liff for Dabah Landscape Designs

Now that you know what to consider when building a fire pit, lets talk about an easy DIY project to build one! There’s a great satisfaction that comes from using something that you built yourself, especially something as wonderful as a fire pit that. Even though it may seem small, it can make a big impact on your outdoor entertainment experience.  You can refer back to our previous fire pit post for a list of things to consider before beginning this project.


Here is what you will need:

Cast concrete wall stones

Gravel base

Construction Adhesive

Edger

Fire bricks

Level

Tamper

Steel rake


Let’s get started!

1. Pick a safe location to build your fire pit, make sure the area is clear of debris or low hanging branches. It should be at least 10 feet from the house.

2. Lay out your pavers in a circle in the shape and size of the fire pit you desire. They should typically be 36 to 44 inches in diameter. Once the blocks are laid out, use your edger to mark out the outside of your fire pit design.

3. Once the blocks are clear, you can use your edger to dig out the area about 2 inches down and use your tamper to level it. Using your level will help to ensure the strength of the base.

4. Using the gravel base, spread 2 inches on the tamped soil area (a rake will help make the spreading easier). Once the gravel base is laid out – tamp it down to make it level.

how-to-build-a-custom-fire-pit-tamp-paver-base.jpg

5. To ensure that the base is strong enough for your fire pit, you can wet the gravel base, tamp it, and add another ½ inch or so (and tamp it again). Always use your level to ensure that everything is even. If the base is not level you can adjust accordingly.

6. Now you can lay out your first layer of blocks on top of the gravel base – make sure the blocks are flush up against one another. You can check the blocks to make sure they are level as well and adjust accordingly.

7. When adding the second row, be sure to stagger the joints of the blocks – once the second row is laid out, remove two blocks at a time and apply construction adhesive to hold your fire pit together.

how-to-build-a-custom-fire-pit-spread-lava.jpg

8. The remaining rows are placed and cemented as the second row – staggered joints and construction adhesive to hold them in place.

9. When your rows are completed you can line the inner walls of the blocks with your fire bricks and use lava rocks to hold them in place

10. Once the fire pit is dried and completed you are ready to enjoy a wonderful night out by the fire with friends and family. Get those marshmallows ready!

DIY Scented Fire Starters:

For those of you who grow herbs in your home or garden, you can dry them and use them to create your own scented fire starter! The recommended herbs are: rosemary, sage, lavender and mint. All you need to do is dry some cuttings of your favorite herbs and once they are dry wrap them in newspaper and tie it up with some natural twine. Simply place your fire starter in the fire pit and get ready to enjoy the sweet aroma of your favorite herbs as you relax by the fire!


http://www.hgtv.com/design/outdoor-design/landscaping-and-hardscaping/how-to-make-a-backyard-fire-pit

DIY Family Garden Project

Kokedama Hanging Garden For Kids (And Adults!)

By: Lauren M. Liff for Dabah Landscape Designs


With the technology kids have access to nowadays, it’s hard to get them away from anything with a screen. So why not let them have a fun learning experience while fostering their creative side and gain quality family time all at once? Try this fun DIY garden project on for size! This project isn’t just fun for the children, but adults can enjoy it as well! Kokedama hanging gardens are fun to make and very easy to care for, so it is perfect for your children (and yourself!). Kokedama means: “moss ball” in Japanese. It is essentially a way to garden by covering the roots with moss and soil and more moss, and then a string is added to hang it up.

For this project you will need:

•   Small, shade-tolerant plant (baby ferns work the best)

•   Scissors

•   Peat soil

•   Bonsai soil

•   Mixing pot

•   Water

•   Garden gloves

•   ½ cup measure

•   Yarn or twine

•   Moss, collected from outside or purchased at a garden center

Here we go!

Step 1: Remove the dirt from the plant by tapping it gently. You want to have the plant so that it is mostly the plant head and its roots (as little soil as possible).

3951ffbf0499de3d_0052-w618-h409-b0-p0--tropical.jpg

Step 2: Mix the two soil types together – 3 ½ cups of peat soil and 1 ½ cup of bonsai soil. Add ½ cup of water to dampen the soil mixture

Step 3: Put on your garden gloves (or don’t if you don’t mind getting a bit dirty!) and shape the soil mixture into a ball – similar to rolling dough. More water can be added (a small amount at a time) if needed to get the soil mixture to stay in a ball shape. Make sure the ball is big enough for the plant roots to fit inside.

4e10c7d495ee16666b25914cee0b1310--bonsai-garden-moss-garden.jpg

Step 4: Take some of your moss and wrap a small amount around the bare roots of your plant (this will help your plant retain moisture)

Step 5: Poke a hole in the soil ball big enough to fit the plant roots in, while maintaining the ball shape of the soil

Step 6: Insert the plant roots into the hole and mold the soil ball around them (again still maintaining the ball shape)

Step 7: Wrap the outside of the soil ball with the remaining moss

Step 8: Take your twine or yarn and wrap it around the ball several times to help keep the moss in place – make sure you leave some yarn or twine above the ball in order to hang it up

Step 9: Take your beautiful new kokedama hanging garden and hang it in a shady place for everyone to enjoy – to keep it healthy simply mist it!


http://kidsactivitiesblog.com/28869/kokedama-hanging-garden-for-kids

The True Cottage Garden Heartthrob

Dicentra eximia: The Fern-leaf Bleeding Heart

By: Lauren M. Liff for Dabah Landscape Designs


            In almost every cottage style garden you see, there is one breathtaking plant that rules over all others: the fern-leaf bleeding heart. A true shade garden staple, this stunning perennial offers beautiful blooms almost all summer long unlike its cousin Dicentra spectabilis. The fern-leaf bleeding heart tends to stay on the dwarf side and rarely grows more than 15 inches in height. It will bloom all summer long without going dormant and it comes in a range of foliage and bloom color, providing gardeners everywhere with many options for the shady spots in their landscape.

447756387922893615.jpg

            A North American native, the fern-leaf bleeding heart has been used by breeders to develop a number of different varieties that come in a wide range of colors from the cherry red flowers of the ‘Luxuriant’ to the pure white flowers of the ‘Snowdrift’. The ‘Bacchanal’ variety offers the deepest red bloom of them all and is adorned with foliage that is almost a silver-blue shade. All varieties are low lying and slow spreading and require little to no maintenance all season long. Dicentra eximia features hearth shaped flowers hanging from long arched stems slightly resembling the look of a dangling bouquet. These incredibly recognizable blooms sit atop finely cut foliage that is typically a blue-green shade.

            The fern-leaf bleeding heart can tolerate very cold winters and don’t tend to be too picky when it comes to soil type, however they do thrive in moist, fertile soil. They can be planted in the sun however they do best in a part to full shade area. Too much shade will lessen the number of flowers. When planting your bleeding heart, avoid placing it where it will be in competition with tree roots – lack of water and available nutrients will greatly shorten its lifespan. To keep it as healthy and happy as possible, it should be divided every 3 or 4 years in early spring and the soil should be amended with organic matter (compost will work the best). Once it is established, the fern-leaf bleeding heart is disease and insect resistant and will flower continuously from spring to fall year after year without needing to be deadheaded or pruned.

            Thanks to its dwarf habit, the fern-leaf bleeding heart is perfect as a front border plant in a shady garden. You can also use it in a shade-rock garden or woodland garden along the rocks. Its beautiful foliage makes it perfect as an edging plant as well. The blue-green color of the leaves contrast beautifully with the purple-red leaves of Heuchera or the gold leaves of the Hosta variety ‘Daybreak’. You can also plant it along side Hakonechloa as well as many fern varieties. The fern-leaf bleeding heart in combination with these companion plants will give your shade garden an incredible range of colors and textures to provide you with season long interest.

 
dicentrakingofhearts_jwb_1_lg_0.jpg
BH205-2.jpg
621722eb4bf7d4ded7ffe184bf1b02a7--bleeding-heart-flower-bleeding-hearts.jpg
.sqs-block-content h1 { font-size: 80px !important; }