Garden Labyrinths: A Journey To The Center

2014labyrinth3-87febde0.jpeg

The Wonders Of Garden Labyrinths

By: Lauren M. Liff for Dabah Landscape Designs


        Quite recently a new outdoor trend has experienced a surge in popularity – garden labyrinths. In reality, outdoor labyrinths are not a new trend at all; they have been created all over the world for centuries. A garden labyrinth is an intricately designed maze that is giving landscape design a new spin. These unique and beautiful structures are designed in a wide variety of shapes and out of an endless range of materials. They are viewed as a meditation aid providing a relaxed, calm, serene feeling to anyone who enters.  

1fcf66b534a7583f34baec537e04107a--labyrinth-garden-backyard-retreat.jpg

        A labyrinth differs from a maze in that the intent is not to journey through but to. They are made up of a singular curving pathway leading to a central area meant for meditation and reflection – the walker proceeds along the path as a walking meditation and upon reaching the center, they pause, turn around, and walk back out. These wondrous designs have been around for thousands of years and are used in a number of different fashions ranging from ceremonial purposes to choreographed dances.

        Studies were done by Dr. Herbert Benson at the Harvard Medical Schools’ Mind/Body Medical Institute on the effects and benefits of labyrinths on the human mind. These studies showed that “focused walking meditations are highly efficient at reducing anxiety” and that the effects hold significant long-term health benefits. Walking through a labyrinth can lower your blood pressure and breathing rates, it can reduce incidents of chronic pain and insomnia and aid in improving fertility among a number of other benefits. Labyrinths have been installed in hospitals, health care facilities and spas across the globe because of the amazing health benefits they hold.

        It is said that the garden labyrinth can become a metaphor for the journey of life: we are all on our own individual singular path through life, full of twists and turns, and just like each person’s individual life, every experience and every moment is different from person to person. Labyrinths represent ones’ journey inward to discover ones true self and then the journey back into the everyday world. Walking a labyrinth is a right brain activity – it triggers creativity, intuition and imagination. It can be your own personal tool to clear your mind, release anxiety, aid in transitional periods or provide healing and self-knowledge.

        Garden labyrinths are becoming increasingly popular throughout the world and their styles can be as simple as using a rope to outline the path or as intricate as using detailed stonework and pavers to create the delicate symbol. Labyrinth designs, paver kits, stencils and pre-made pathways can be ordered online or DIY tutorials are readily available as well. Hardscaping ones property normally consists of the usual yet ever popular items: retaining walls, patios, outdoor kitchens or fire pits…why not stand out from the crowd and add a hardscape feature to your property that is truly unique. Building an outdoor labyrinth into your landscape will not only make your property one of a kind, but it will give you a one of a kind experience with every walk you take. 

WilmingtonDE-Montesori-24_Abingdon-pavers-CFRL.jpg
14ed2ecea0c9c11b960335e7537b56bb.jpg

How to Build Your Own Fire Pit

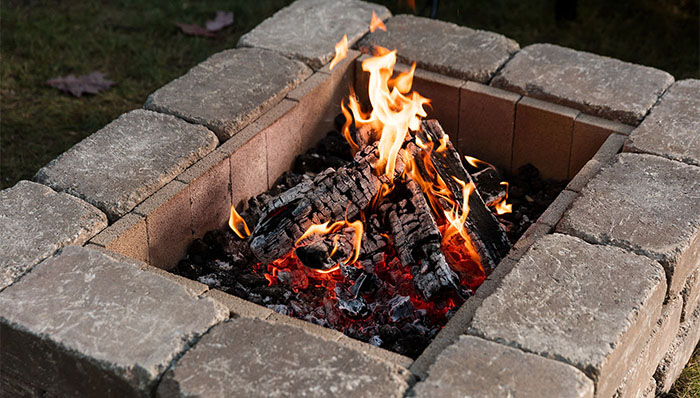
build-a-fire-pit-hero.jpg

DIY: Building a Fire Pit

By: Lauren M. Liff for Dabah Landscape Designs

Now that you know what to consider when building a fire pit, lets talk about an easy DIY project to build one! There’s a great satisfaction that comes from using something that you built yourself, especially something as wonderful as a fire pit that. Even though it may seem small, it can make a big impact on your outdoor entertainment experience.  You can refer back to our previous fire pit post for a list of things to consider before beginning this project.


Here is what you will need:

Cast concrete wall stones

Gravel base

Construction Adhesive

Edger

Fire bricks

Level

Tamper

Steel rake


Let’s get started!

1. Pick a safe location to build your fire pit, make sure the area is clear of debris or low hanging branches. It should be at least 10 feet from the house.

2. Lay out your pavers in a circle in the shape and size of the fire pit you desire. They should typically be 36 to 44 inches in diameter. Once the blocks are laid out, use your edger to mark out the outside of your fire pit design.

3. Once the blocks are clear, you can use your edger to dig out the area about 2 inches down and use your tamper to level it. Using your level will help to ensure the strength of the base.

4. Using the gravel base, spread 2 inches on the tamped soil area (a rake will help make the spreading easier). Once the gravel base is laid out – tamp it down to make it level.

how-to-build-a-custom-fire-pit-tamp-paver-base.jpg

5. To ensure that the base is strong enough for your fire pit, you can wet the gravel base, tamp it, and add another ½ inch or so (and tamp it again). Always use your level to ensure that everything is even. If the base is not level you can adjust accordingly.

6. Now you can lay out your first layer of blocks on top of the gravel base – make sure the blocks are flush up against one another. You can check the blocks to make sure they are level as well and adjust accordingly.

7. When adding the second row, be sure to stagger the joints of the blocks – once the second row is laid out, remove two blocks at a time and apply construction adhesive to hold your fire pit together.

how-to-build-a-custom-fire-pit-spread-lava.jpg

8. The remaining rows are placed and cemented as the second row – staggered joints and construction adhesive to hold them in place.

9. When your rows are completed you can line the inner walls of the blocks with your fire bricks and use lava rocks to hold them in place

10. Once the fire pit is dried and completed you are ready to enjoy a wonderful night out by the fire with friends and family. Get those marshmallows ready!

DIY Scented Fire Starters:

For those of you who grow herbs in your home or garden, you can dry them and use them to create your own scented fire starter! The recommended herbs are: rosemary, sage, lavender and mint. All you need to do is dry some cuttings of your favorite herbs and once they are dry wrap them in newspaper and tie it up with some natural twine. Simply place your fire starter in the fire pit and get ready to enjoy the sweet aroma of your favorite herbs as you relax by the fire!


http://www.hgtv.com/design/outdoor-design/landscaping-and-hardscaping/how-to-make-a-backyard-fire-pit

Guide To Working With The Right Landscape Designer: Part 2

Top 4 Questions To Ask About Your Landscape Design Project

By: Lauren M. Liff for Dabah Landscape Designs

         You’ve hired a landscape designer and you're bursting with excitement as images of picturesque gardens float through your mind. The anticipation of the beauty of your completed project builds, but then your mind starts to wander. What if something goes wrong? You asked the right questions before hiring your landscape designer, but what’s next? If you’ve never worked with a landscape designer before, you want to make sure the right questions are raised during your project. Here are the top questions to ask once you’ve hired your landscape designer, before the first shovel hits the ground:

1. What are your ideas for our design? Once you have discussed your “wish list” with your designer, and they have had a chance to take a look at the property, you want to find out what their ideas are for your garden. Designers can present their designs to you in a number of ways: a collage-style mood board with pictures of plants and other features, a two-dimensional/to-scale drawing created with a CAD program, a 3D rendering or a hand drawn to-scale blueprint of the design. When the design is presented to you, make sure everything on your wish list is depicted and voice your opinion throughout the design project.

backyard.jpg

2. What is the estimated cost of our project? Finding out the estimated cost of your project is key when it comes to your budget. Since you’ve set a budget before beginning this phase of the project, you know how much you are willing to spend. Be sure to ask for the estimated cost of the design as well as the installation. You also want to ask how changes to the project during the installation will be handled – these are called “add ons”. It is important to know how add-ons will effect the total cost of the project as designed changes do often arise during the installation.

3. What can we do to reduce the cost? Hardscape installations such as pathways, patios, decks and retaining walls are typically more expensive than softscape installations (plant material). So sufficed to say, the more hardscapes in the design the more costly the project will be. Materials used for hardscape installations vary greatly for the product as well as the installation – be sure to discuss with your designer ways to reduce the cost of the project to stay within your budget. Designers will be able to provide you with options that can save you money without losing any of the creativity of the design.

4. How long will it take for the project to be completed? The time it takes for a project to go from the design phase to the installation phase and then to completion varies on a number of factors. The size and scope of the job, acquiring the necessary materials and plants, weather and other set backs all play a part in how long the project will take to be completed. There is no way to guarantee an exact completion date due to these factors, but you can ask the designer for an estimated date range for when the installation will be finished. Remember, quality designs and installations take careful planning and time. Patience is key in this process.

         Keeping these questions in mind throughout the design process will allow you to be sure-footed in your decision. You always want to be on the same page as your landscape designer to avoid miscommunications that could lead to errors in the installation process. When it comes to making sure that the professional design is what you had envisioned for your property, you want to keep an open line of communication between yourself and the designer. Asking these questions will allow you to do just that, as well as allow for a smooth design phase and an easy transition into the installation phase. 


Source

Attention S’mores Lovers: What you Need To Know About Fire Pits

What to Consider When Planning A Fire Pit

By: Lauren M. Liff for Dabah Landscape Designs


The definition of an outdoor space is changing drastically as the years pass; it has gotten to a point where simply having a deck and a grill just won’t cut it. Backyards everywhere are becoming much more detailed and full of “accessories”. From outdoor kitchens to outdoor living rooms complete with fireplaces and detailed stonework designed to look like elegant area rugs. As backyards everywhere are being transformed, the number one fixture being implemented into almost every outdoor design is the fire pit. If you are thinking about adding a fire pit to your outdoor space, here are several things to keep in mind:

1. What is your budget? When planning the design of your fire pit, you want to keep your budget in mind. Fire pits can be all different shapes and sizes and can be made of a variety of materials; the cost of a fire pit can range anywhere from $200.00 and up. If you are building a small fire pit, you can buy the stones and dig the hole yourself or buy a simple fire pit unit from a retailer to keep the cost low. The cost can obviously get increasingly high depending on the sophistication of your fire pit.

2. Will it be permanent or portable? Are you looking for a fire pit that will become the focal point in your yard or do you want to be able to bring the fire pit along with you to a gathering? For a built-in design, the materials should match either your home or other materials in your garden so that everything can flow together smoothly. Portable fire pits come in a wide variety of materials and shapes. There are fire bowls, fire tables and also chimney-style options as well. Whatever style you chose, make sure to use to proper stones and materials for your fire pit to work safely. 

3. Will it use wood or gas? Wood and gas are the most common choices for fueling a fire pit. If you are looking for that all too familiar true fire pit smell, then wood is the way to go – just make sure your fire pit has a screen. If you don’t care if you have that smell or not, or you want a quick starter, you can go with gas or propane. Some of these fire pits have remote start capabilities. The fire from a gas-fueled pit won’t be as hot as a wood fire; you also won’t hear the crackling or get that smoke that comes from a wood fire.

4. Where will it be placed? When placing a portable fire pit, it is best to use it on a natural surface – concrete, stone, grave, or brick (for example) will work fine. Embers could fly from your fire pit and could start a fire if not placed on the proper surface. Permanent fire pits are typically built on a gravel base. The fire pit should be built so that it is proportional to the size of your yard and will allow for seating and proper air circulation. In terms of its location in the yard, most areas have a requirement that the fire pit must be at least 10 feet from the home and neighbors’ yards. Permits are sometimes needed for larger fire pits and some require a site inspection to make sure that the location is safe for a fire pit. Before building your fire pit make sure to check your local ordinances to see what is required.

Whether you decide to build your fire pit with a premade kit from a local retailer or you opt to have a landscape professional design and install it, it’s always important to plan thoroughly before beginning the installation process. When it comes to your fire pit, you want to think “safety” above all else.

Safety Tips:

1. Check wind direction before lighting a fire

2. Don’t use flammable fluids to light/relight fires

3. Don’t ware flammable clothing (nylon) or anything loose-fitting

4. Avoid using soft woods (pine/cedar) – they can “pop” and throw sparks

5. Keep children and pets at least 3 feet away from the fire

Building A Retaining Wall? Here's What You Need To Know!

10 Things To Think About When Building A Retaining Wall

By: Lauren M. Liff for Dabah Landscape Designs


Retaining walls are incredibly important when it comes to controlling erosion or decreasing the dangers of a steep slope but they can also be used as a decorative structure to highlight or define your garden areas. They have become increasingly popular over the past few years and not only add to the beauty of your outdoor space but increase the value of the property itself. To build a successfully constructed and well-designed retaining wall, there are several factors you need to keep in mind. 

1. When designing your wall, you want to make sure that it will be incorporated into your lifestyle. Retaining walls are now being used to create multi-level garden areas or multi-use outdoor spaces. You want to make sure that your retaining wall enhances not only your outdoor space but your lifestyle as well.

2. Get creative with the design of your retaining wall; it’s important to remember that when it comes to transforming your landscape, the possibilities are as endless as your imagination. A retaining wall with a curve is more interesting than a straight line. A garden hose or a large rope can be used to help you layout your retaining wall design – then use a shovel to mark it out. 

When planning the construction of your retaining wall, there are two main factors you need to consider:

3. Size definitely matters when building a retaining wall. Walls that are 4 feet and under in height can be easily designed and built without thinking too much about structure. For larger walls, structure is important because you don’t want it to collapse; you will also need to check your local building regulations as permits might be required for the construction of a wall more than 4 feet in height.

4. Plan for drainage; a wall that has a slope dropping towards it will need added drainage at its base. To allow for drainage you can install a fabric-covered drainage pipe and some gravel at the base (the fabric will keep the pipe from becoming clogged).

Leveling and grading are incredibly important when it comes to constructing a retaining wall:

5. If you are building your retaining wall up a steep slope from a lower grade you will need to gradually step up the retaining wall to achieve a greater slope. Think about terracing, you essentially want to turn your one steep slope into several more level areas slightly resembling a staircase. This will allow you to be able to maneuver the slope safely and the newly created level areas can then be used for planting.

6. Keeping your wall and the surrounding area level is incredibly important as it will ensure that your wall is not only well balanced but sturdy as well. Before building your wall make sure to level out the space and as you continue to build the wall be sure to check that each block is level – this will also give your wall a consistent look.

How long your wall will last and how sturdy it is both depend on how well constructed your wall is:

7. Creating a solid base is key because this will set the tone for your entire project. When creating the base you want to dig out a trench several inches below grade and tamp it (compact it) to ensure that it is level. Then you add gravel and tamp it as well before constructing your first row.

8. Backfilling your wall provides support for your structure. When you complete a row of blocks, backfill with gravel and tamp it – remember that every row must be level. You want to do this all the way up your wall; when you are about 3 inches from the top of the wall you can backfill with soil so that the gravel is not seen.

The style of blocks you use should flow with the design and atmosphere of your outdoor space:

vintage-2.jpg

9. Using manufactured blocks and stones are easier when it comes to uniformity and stability. Since no stone is exactly the same, make sure to color match and space out stones that are uneven in color to create a consistent look. You can also use natural stone to build your wall, it might not be as easy to work with but there is such beauty in a creatively designed natural stone wall. 

10. Cap blocks will provide your wall with the necessary finishing touch. You can use masonry adhesive to secure the cap blocks to the top row of your wall to hold them in place. This will give your wall a clean finished look – much like adding edging to a garden bed or paver patio.

Installing a retaining wall can allow you to organize your garden areas in the most elegant way. A well-designed retaining wall can completely transform your property and a well-constructed one can stand the test of time. Following these pointers will allow you to design and construct a retaining wall that has both stability and beauty. 


http://www.diynetwork.com/how-to/outdoors/hardscape/10-things-you-must-know-about-retaining-walls-pictures

How Stone Pavers Can Enhance Your Landscape

Stone Pavers: 4 Benefits of Using Stone Pavers

By: Lauren M. Liff for Dabah Landscape Designs


            Hardscaping has become increasingly popular over the years as people are now starting to realize more the value detailed stonework adds to your home and your lifestyle. Adding stone pavers to your landscape is a home improvement project that will better the aesthetics of your property, improve your curb appeal and increase your overall property value. From an elegantly detailed stone patio in the backyard to a simple walkway to your front entrance, implementing stone pavers into your landscape design can add structure, charm and so much more to your property.

             Using stone pavers in your landscape design is a great way to add detail and character to your property; it will allow you to transform the exterior of your home into a work of art. You can use a high quality material to create an outdoor stone patio and turn your backyard into your own private oasis. You can use stone pavers to create walkways throughout your property or to frame and highlight your garden areas. When an appraiser comes to look at a property, one of the first things they look at is the design and overall quality of the landscape – having stone pavers implemented in your outdoor design will help your landscape better reflect your personality and your lifestyle while increasing your property value at the same time.

            While adding elegance and charm to your property, installing stone paver walkways creates organized paths throughout your property. Having a beautifully designed walkway will also allow you to maneuver safely throughout your property. By creating a permeable walkway surface, you will significantly reduce the amount of standing water throughout your yard. The water will flow though the base of the pavers to the ground below providing a less slick pathway and a better route for the water to drain from your property. 

            The first thing a potential homebuyer is going to notice when they pull up to your property is its’ curb appeal. Adding stone pavers into your outdoor design is a surefire way to significantly enhance your homes curb appeal.  Using stone pavers in the landscape can allow you to highlight and give definition to your garden areas or make your entry way more enticing and more welcoming to your friends and family. Implementing a hardscape design in your landscape can completely transform the feel and look of your property in all the right ways.

            When it rains, the flat areas throughout your property turn into mini ponds and large driveways can create major runoff issues. With stone pavers installed on your property, the water will be directed and controlled, reducing the risk of standing water and potential flooding. When stone pavers are properly installed, the ground is pitched away from the house and surrounding garden beds; by directing the water away from the foundation of the property you are avoiding any potential damage rising waters could cause.

            The installation of stone pavers, whether in a patio or in a walkway, is a wonderful and affordable way to increase you’re the charm, value and safety of your property. The exterior of your home is just as important as the interior and should reflect the same elegance and personality as such. When the reasons we just discussed are taken into consideration, its funny that such a small home improvement project could make that much of a difference; the end result will be a landscape you, your friends and your family can enjoy for years to come.  


http://www.raymondlawnservice.com/Philadelphia-Landscaping/4-ways-stone-pavers-can-enhance-your-homes-landscape/

Top Trends in Residential Hardscapes

Top Trends “Rocking” the Hardscape World

By: Lauren Liff for Dabah Landscape Designs


         Hardscaping has become increasingly popular as of late and the trends in hardscape design have shown to be primarily centered on outdoor entertainment. Homeowners are paying more attention to architectural details and materials when designing their outdoor space. Natural stone textures, eye-catching patterns and unique designs are being seen a lot more as homeowners want the exterior of their home to reflect the same atmosphere and functionality as the interior. Let’s discuss some of the current trending details in the hardscape world.

         It’s no wonder that fire pits are one of the top “must-haves” in any outdoor space. However, it is not just a simple fire pit design that is taking the hardscape world by storm. Homeowners are learning that built-in benches, seat walls and ledges made of natural stone, all surrounding a fire pit, do indeed make the space more elegant and more inviting than the fire pit alone. The popularity of this design displays the developing trend of multi-level seating as well as eclectic paver choices and designs.

         Outdoor kitchens also continue to grow in popularity especially with the technological advances in audio-visual equipment and Wi-Fi accessibility as well as a growing interest in sophisticated lighting. Another trend within outdoor kitchens is the desire for multiple cooking surfaces; homeowners now want their outdoor eating area to more than just a grill. Gas burners, convection ovens and brick ovens are now almost seen as a necessity when designing an outdoor kitchen.

         Aside from an outdoor cooking space, outdoor living rooms are also becoming a standard in new construction especially for the design of higher end homes. One of the newer trends in outdoor living rooms is the faux rug paver design. Homeowners are now turning their backyards into literal extensions of their home – the concept of “bringing the indoors out” is beginning to prove to be one of the more popular home improvement projects. Water features have always been a statement piece in a outdoor space, from ponds to fountains to man-made streams – they are showing a large increase in residential popularity as of late.

         With the shape the environment is in today, homeowners everywhere are looking for more ways to “go green”. Thus creating the new trend of permeable pavers. These pavers improve the quality and reduce the quantity of storm water runoff. With a cistern and a pump, the water that filters through the pavers can be collected and recycled for irrigation. Commercial and large residential developers have also found that with these pavers there is no need for a retention pond, thus increasing the amount of usable space.

         Years ago, when you thought of an outdoor space it consisted of maybe a pool and a grill. Slowly but surely times are changing and homeowners are now taking full advantage of the advances in design techniques, outdoor appliances and hardscape materials. A backyard has become so much more than what it used to be. Now you are able to design, create and totally enjoy your own oasis outdoors with every comfort of the indoors.


http://www.belgard.com/resource_center/tools_and_services/news_and_articles/emerging_trends_in_residential_hardscape_design

Why Should I Have an Outdoor Kitchen?

Outdoor Kitchens: What They Can Do For You and Your Property

By: Lauren M. Liff for Dabah Landscape Designs

backyard.jpg

There is no better way to spend a warm summer night than dining with friends and family on a beautiful stone patio, surrounded by the delicious smells of a home-cooked meal. Having an outdoor kitchen will let you do just that! Of course, you might ask, “Why spend the money on an outdoor kitchen?” The answer: An outdoor kitchen is a great investment, and one you will enjoy for many years to come.

The first (and most popular) reason for adding an outdoor kitchen is that it instantly converts a ho-hum backyard space into a breath-taking cooking and entertainment center. Imagine what it would be like to mingle with guests outdoors while dinner is on the grill, the sides are simmering on the stovetop, there’s more than enough space to move around, and the cook won’t have to miss out on all the fun!

Also, did you know that an outdoor kitchen could increase your property’s value? Experts agree that a homeowner who installs an outdoor kitchen can expect a return on investment from a low of 70% to a high of almost 200% percent. And that makes sense. Stainless steel grills and other modern outdoor appliances are easy to clean, and able to withstand the changing outdoor temperatures. So, your new kitchen will serve you well for many years and add to your property’s value, if—and when—you decide to sell. 

CI-Kitchen-Aid_outdoor-grill_s3x4.jpg.rend.hgtvcom.1280.1707.jpeg

Often, the first thing that comes to mind when considering an addition is the disruption (and mess) that comes with construction. For an outdoor kitchen, the transformation takes place, well, outdoors. Building an outdoor kitchen gives you that desired extra living space by using the room you already have on your back patio. Outdoor kitchens can lead to quicker cleanups and healthier lifestyles. Strong cooking odors will no longer fill your home, and grilling beats frying any day because there’s no batter coating or dripping grease.

Everyone likes to save money, right?  Well, did you know that an outdoor kitchen may help you cut your utilities bills? When you cook up a storm inside, the temperature rises, causing air conditioning to work harder than it should. Cooking outdoors will help you save on energy consumption. Want to hold on to even more money? Having your own outdoor oasis may slash your restaurant budget, too; you can enjoy a “night out” experience in your own backyard and keep your wallet in your pocket.

When you consider the decision to build an outdoor kitchen, it’s clear to see that the pros greatly outweigh the cons. Building an outdoor kitchen truly is an investment and will prove to be more rewarding than costly. The design can be customized to your budget and your needs. When your project is completed, you can sit back, relax, and congratulate yourself on a decision well made. 

https://learn.compactappliance.com/benefits-of-outdoor-kitchen/

.sqs-block-content h1 { font-size: 80px !important; }