landscape construction

How to Build Your Own Fire Pit

build-a-fire-pit-hero.jpg

DIY: Building a Fire Pit

By: Lauren M. Liff for Dabah Landscape Designs

Now that you know what to consider when building a fire pit, lets talk about an easy DIY project to build one! There’s a great satisfaction that comes from using something that you built yourself, especially something as wonderful as a fire pit that. Even though it may seem small, it can make a big impact on your outdoor entertainment experience.  You can refer back to our previous fire pit post for a list of things to consider before beginning this project.


Here is what you will need:

Cast concrete wall stones

Gravel base

Construction Adhesive

Edger

Fire bricks

Level

Tamper

Steel rake


Let’s get started!

1. Pick a safe location to build your fire pit, make sure the area is clear of debris or low hanging branches. It should be at least 10 feet from the house.

2. Lay out your pavers in a circle in the shape and size of the fire pit you desire. They should typically be 36 to 44 inches in diameter. Once the blocks are laid out, use your edger to mark out the outside of your fire pit design.

3. Once the blocks are clear, you can use your edger to dig out the area about 2 inches down and use your tamper to level it. Using your level will help to ensure the strength of the base.

4. Using the gravel base, spread 2 inches on the tamped soil area (a rake will help make the spreading easier). Once the gravel base is laid out – tamp it down to make it level.

how-to-build-a-custom-fire-pit-tamp-paver-base.jpg

5. To ensure that the base is strong enough for your fire pit, you can wet the gravel base, tamp it, and add another ½ inch or so (and tamp it again). Always use your level to ensure that everything is even. If the base is not level you can adjust accordingly.

6. Now you can lay out your first layer of blocks on top of the gravel base – make sure the blocks are flush up against one another. You can check the blocks to make sure they are level as well and adjust accordingly.

7. When adding the second row, be sure to stagger the joints of the blocks – once the second row is laid out, remove two blocks at a time and apply construction adhesive to hold your fire pit together.

how-to-build-a-custom-fire-pit-spread-lava.jpg

8. The remaining rows are placed and cemented as the second row – staggered joints and construction adhesive to hold them in place.

9. When your rows are completed you can line the inner walls of the blocks with your fire bricks and use lava rocks to hold them in place

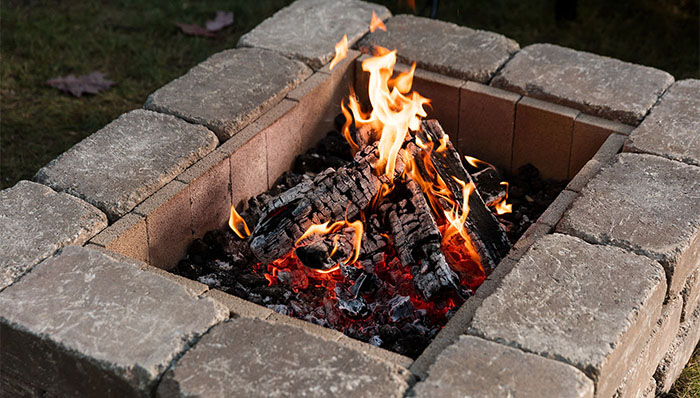
10. Once the fire pit is dried and completed you are ready to enjoy a wonderful night out by the fire with friends and family. Get those marshmallows ready!

DIY Scented Fire Starters:

For those of you who grow herbs in your home or garden, you can dry them and use them to create your own scented fire starter! The recommended herbs are: rosemary, sage, lavender and mint. All you need to do is dry some cuttings of your favorite herbs and once they are dry wrap them in newspaper and tie it up with some natural twine. Simply place your fire starter in the fire pit and get ready to enjoy the sweet aroma of your favorite herbs as you relax by the fire!


http://www.hgtv.com/design/outdoor-design/landscaping-and-hardscaping/how-to-make-a-backyard-fire-pit

Building A Retaining Wall? Here's What You Need To Know!

10 Things To Think About When Building A Retaining Wall

By: Lauren M. Liff for Dabah Landscape Designs


Retaining walls are incredibly important when it comes to controlling erosion or decreasing the dangers of a steep slope but they can also be used as a decorative structure to highlight or define your garden areas. They have become increasingly popular over the past few years and not only add to the beauty of your outdoor space but increase the value of the property itself. To build a successfully constructed and well-designed retaining wall, there are several factors you need to keep in mind. 

1. When designing your wall, you want to make sure that it will be incorporated into your lifestyle. Retaining walls are now being used to create multi-level garden areas or multi-use outdoor spaces. You want to make sure that your retaining wall enhances not only your outdoor space but your lifestyle as well.

2. Get creative with the design of your retaining wall; it’s important to remember that when it comes to transforming your landscape, the possibilities are as endless as your imagination. A retaining wall with a curve is more interesting than a straight line. A garden hose or a large rope can be used to help you layout your retaining wall design – then use a shovel to mark it out. 

When planning the construction of your retaining wall, there are two main factors you need to consider:

3. Size definitely matters when building a retaining wall. Walls that are 4 feet and under in height can be easily designed and built without thinking too much about structure. For larger walls, structure is important because you don’t want it to collapse; you will also need to check your local building regulations as permits might be required for the construction of a wall more than 4 feet in height.

4. Plan for drainage; a wall that has a slope dropping towards it will need added drainage at its base. To allow for drainage you can install a fabric-covered drainage pipe and some gravel at the base (the fabric will keep the pipe from becoming clogged).

Leveling and grading are incredibly important when it comes to constructing a retaining wall:

5. If you are building your retaining wall up a steep slope from a lower grade you will need to gradually step up the retaining wall to achieve a greater slope. Think about terracing, you essentially want to turn your one steep slope into several more level areas slightly resembling a staircase. This will allow you to be able to maneuver the slope safely and the newly created level areas can then be used for planting.

6. Keeping your wall and the surrounding area level is incredibly important as it will ensure that your wall is not only well balanced but sturdy as well. Before building your wall make sure to level out the space and as you continue to build the wall be sure to check that each block is level – this will also give your wall a consistent look.

How long your wall will last and how sturdy it is both depend on how well constructed your wall is:

7. Creating a solid base is key because this will set the tone for your entire project. When creating the base you want to dig out a trench several inches below grade and tamp it (compact it) to ensure that it is level. Then you add gravel and tamp it as well before constructing your first row.

8. Backfilling your wall provides support for your structure. When you complete a row of blocks, backfill with gravel and tamp it – remember that every row must be level. You want to do this all the way up your wall; when you are about 3 inches from the top of the wall you can backfill with soil so that the gravel is not seen.

The style of blocks you use should flow with the design and atmosphere of your outdoor space:

vintage-2.jpg

9. Using manufactured blocks and stones are easier when it comes to uniformity and stability. Since no stone is exactly the same, make sure to color match and space out stones that are uneven in color to create a consistent look. You can also use natural stone to build your wall, it might not be as easy to work with but there is such beauty in a creatively designed natural stone wall. 

10. Cap blocks will provide your wall with the necessary finishing touch. You can use masonry adhesive to secure the cap blocks to the top row of your wall to hold them in place. This will give your wall a clean finished look – much like adding edging to a garden bed or paver patio.

Installing a retaining wall can allow you to organize your garden areas in the most elegant way. A well-designed retaining wall can completely transform your property and a well-constructed one can stand the test of time. Following these pointers will allow you to design and construct a retaining wall that has both stability and beauty. 


http://www.diynetwork.com/how-to/outdoors/hardscape/10-things-you-must-know-about-retaining-walls-pictures

.sqs-block-content h1 { font-size: 80px !important; }