Building A Retaining Wall? Here's What You Need To Know!

10 Things To Think About When Building A Retaining Wall

By: Lauren M. Liff for Dabah Landscape Designs


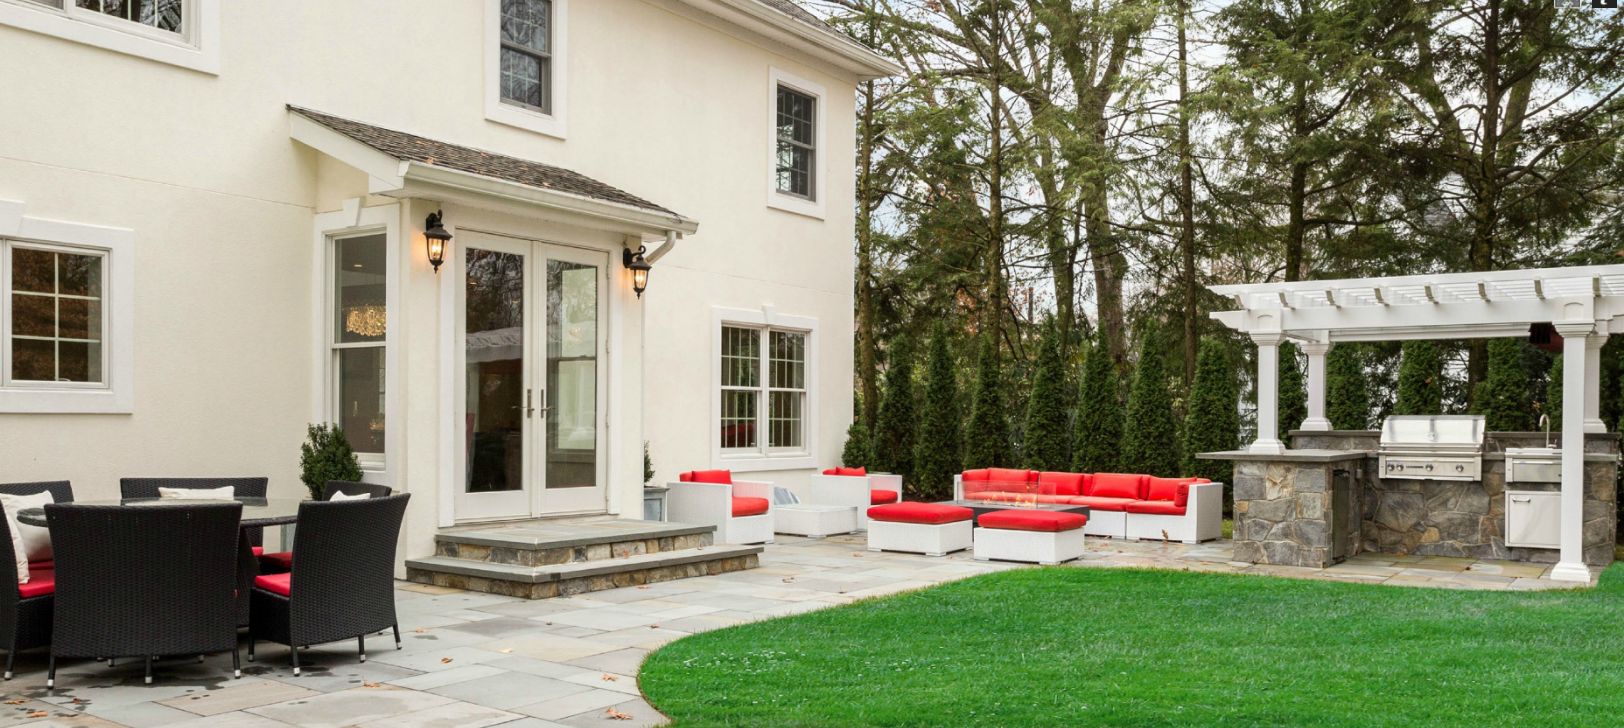
Retaining walls are incredibly important when it comes to controlling erosion or decreasing the dangers of a steep slope but they can also be used as a decorative structure to highlight or define your garden areas. They have become increasingly popular over the past few years and not only add to the beauty of your outdoor space but increase the value of the property itself. To build a successfully constructed and well-designed retaining wall, there are several factors you need to keep in mind. 

1. When designing your wall, you want to make sure that it will be incorporated into your lifestyle. Retaining walls are now being used to create multi-level garden areas or multi-use outdoor spaces. You want to make sure that your retaining wall enhances not only your outdoor space but your lifestyle as well.

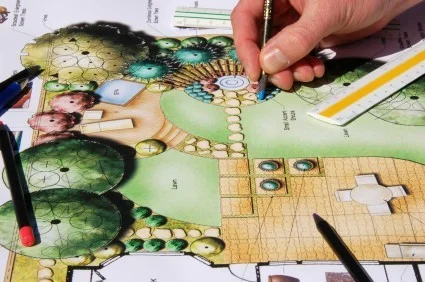
2. Get creative with the design of your retaining wall; it’s important to remember that when it comes to transforming your landscape, the possibilities are as endless as your imagination. A retaining wall with a curve is more interesting than a straight line. A garden hose or a large rope can be used to help you layout your retaining wall design – then use a shovel to mark it out. 

When planning the construction of your retaining wall, there are two main factors you need to consider:

3. Size definitely matters when building a retaining wall. Walls that are 4 feet and under in height can be easily designed and built without thinking too much about structure. For larger walls, structure is important because you don’t want it to collapse; you will also need to check your local building regulations as permits might be required for the construction of a wall more than 4 feet in height.

4. Plan for drainage; a wall that has a slope dropping towards it will need added drainage at its base. To allow for drainage you can install a fabric-covered drainage pipe and some gravel at the base (the fabric will keep the pipe from becoming clogged).

Leveling and grading are incredibly important when it comes to constructing a retaining wall:

5. If you are building your retaining wall up a steep slope from a lower grade you will need to gradually step up the retaining wall to achieve a greater slope. Think about terracing, you essentially want to turn your one steep slope into several more level areas slightly resembling a staircase. This will allow you to be able to maneuver the slope safely and the newly created level areas can then be used for planting.

6. Keeping your wall and the surrounding area level is incredibly important as it will ensure that your wall is not only well balanced but sturdy as well. Before building your wall make sure to level out the space and as you continue to build the wall be sure to check that each block is level – this will also give your wall a consistent look.

How long your wall will last and how sturdy it is both depend on how well constructed your wall is:

7. Creating a solid base is key because this will set the tone for your entire project. When creating the base you want to dig out a trench several inches below grade and tamp it (compact it) to ensure that it is level. Then you add gravel and tamp it as well before constructing your first row.

8. Backfilling your wall provides support for your structure. When you complete a row of blocks, backfill with gravel and tamp it – remember that every row must be level. You want to do this all the way up your wall; when you are about 3 inches from the top of the wall you can backfill with soil so that the gravel is not seen.

The style of blocks you use should flow with the design and atmosphere of your outdoor space:

vintage-2.jpg

9. Using manufactured blocks and stones are easier when it comes to uniformity and stability. Since no stone is exactly the same, make sure to color match and space out stones that are uneven in color to create a consistent look. You can also use natural stone to build your wall, it might not be as easy to work with but there is such beauty in a creatively designed natural stone wall. 

10. Cap blocks will provide your wall with the necessary finishing touch. You can use masonry adhesive to secure the cap blocks to the top row of your wall to hold them in place. This will give your wall a clean finished look – much like adding edging to a garden bed or paver patio.

Installing a retaining wall can allow you to organize your garden areas in the most elegant way. A well-designed retaining wall can completely transform your property and a well-constructed one can stand the test of time. Following these pointers will allow you to design and construct a retaining wall that has both stability and beauty. 


http://www.diynetwork.com/how-to/outdoors/hardscape/10-things-you-must-know-about-retaining-walls-pictures

DIY: At Home Soil Tests

Testing Your Soil: Texture and pH Level

By: Lauren M. Liff for Dabah Landscape Designs


            The soil in your garden is extremely important to your plants: it provides nourishment during the growing season, protects the roots in the winter and allows them to grow and reach their full potential. Testing your soil regularly can help ensure that the plants in your garden are happy and healthy year round. Knowing what type of soil is in your landscape and knowing the pH level of that soil is more important than most people would think. The pH level of your soil effects what nutrients are present and how available they are for your landscape plants. Although soil tests are usually inexpensive, it does require money nonetheless – not to mention time to receive your results. In this article I’m going to explain a step-by-step method to test your soils pH level and texture without a kit. With this DIY soil test you’ll be able to learn what amendments you need to make to provide your plants with a healthy soil environment and allow for maximum plant growth.

            The pH level of your soil is key; when the pH level rises, nutrients like phosphorus and iron (for example) become less available. When the pH level drops, you run the risk of your soil becoming toxic and causing harm to your plant material.  Each plant has a preference in terms of the pH level of the soil; most plants do well in a slightly acidic environment with a pH of 6.0 – 6.5. Some plants however, like hollies and azaleas, thrive in a more acidic environment. Knowing the acidity level of your soil will help you to identify and fix any deficiencies that may be present.  This DIY pH test is very simple: all you need is vinegar, baking soda, distilled water and of course, soil!

Step 1: Collect 1 cup of soil – for the most accurate results collect samples from different spots in your garden. Try to dig at least 6 inches down to collect your samples.

Step 2: Mix your soil samples together thoroughly; get two empty containers and put 2 teaspoons of your soil sample into each container

Step 3: Add a ½ cup of vinegar to one of the cups of soil

**If the mixture starts to fizz then you have alkaline soil – a pH between 7 and 8**

Step 4: Add distilled water to the other container of soil – enough to make the soil muddy

Step 5: Add a ½ cup of baking soda to the muddy mixture

**If the mixture starts to fizz then you have acidic soil – a pH between 5 and 6**

**If your soil doesn’t fizz at all in either container then the soil is neutral with a pH of 7**


            Now that we know roughly the pH level of your soil, let’s take a look at the soil texture. Soil is made up of 3 main components: clay, sand and silt. Knowing the texture of your soil will show you how your soil absorbs water and what you will need to use to amend it (compost, mulch, or manure for example).  The ideal mix of these 3 components would be: 20% clay, 40% silt and 40% sand – this would be considered a loam soil which is the ideal soil texture. All you need for this soil texture test is a clean jar with a tight lid (a pint or quart mason jar works the best), water, dish soap and soil. 

Step 1: Collect soil samples from your garden (if you did the pH test you can use the leftover soil) – and using a mason jar, fill it halfway with soil.

Step 2: Fill the jar with water so that it is about ¾ full then add in a teaspoon of liquid dish soap.

Step 3: Tighten the lid and shake the jar for several minutes to mix up the particles.

Step 4: Put your jar aside and let it sit for several hours to give the particles time to settle

Step 5: Use the soil textural triangle to calculate your gardens' soil texture


            The particles will separate into layers: the heaviest particles will sink to the bottom – this will be the sand layer, next will be the silt layer, and on top will be the clay particles. Any organic matter in the soil will float to the top of the jar. The color of the soil itself will tell you about the organic matter content of your soil. Lighter soils have less organic matter and darker soils will warm up faster in the spring. 

            The longer you wait for soil test to settle, the more accurate your reading will be. When I did this test I left my soil sample to sit for just about 24 hours and then took the reading the following afternoon. You can use a ruler to measure your layers: take the measurement of each layer and divide it by the measurement of all 3 layers combined and multiply by 100 to get the percentage. You can use a permanent marker to mark off the layers to make the measuring a bit easier. Once you have your percentages, you can use the soil textural triangle (pictured below) to decipher what kind of soil you have; simply plot your percentages on the triangle to find your exact soil texture. Once you have found your soil texture, you will be able to plan a course of action to amend it (if needed).


            Based on your soil pH reading and the results from your texture test you will know what amendments need to be made to ensure that your soil is as healthy as it can be for your plants. You can test your soil yearly if significant amendments need to be made or you can test it as needed. If you do decide to test your soil regularly, it’s best to test it in the fall and any amendments you need to make should be done in the spring. These tests are very easy to do and will tell you a lot about your garden; the more you know about your soil, the easier it will be to provide your plants with the healthiest growing environment. 

Kopper King: The Hibiscus With Larger Than Life Flowers

Hibiscus x moscheutos 'Kopper King': The Kopper King Hibiscus

By: Lauren M. Liff for Dabah Landscape Designs


            In New Jersey, the tropical hibiscus is one of the more sought after annuals seen quite frequently in entryway urns, patio planters and especially surrounding pools – but did you know that there are hibiscus plants that are actually hardy for our area? The Kopper King hibiscus is stopping people in their tracks wherever they are seen and for good reason! Becoming more popular in the New Jersey landscape, this perennial beauty is absolutely breathtaking with its massive blossoms, striking colors and stunning foliage. As opposed to the tropical hibiscus, this perennial is easier to grow and maintain and will be your landscape show stopper year after year.

            With a sturdy, compact and slightly rounded habit, this woody-based perennial grows to be about 3 to 4 feet tall and 2 to 4 feet wide. The size of the flowers is comparable to that of a dinner plate measuring from 10 to 12 inches in diameter. The remarkable size of the blooms makes them one of the largest flowers produced by any perennial in this area. The flowers resemble that of its cousin the hollyhock; they are light pink with showy red veins leading to a bright red center. These massive blooms sit atop foliage that has a striking deep purple-red color, giving the plant its name ‘Kopper King’. One of the wonderful characteristics of this perennial is its extended bloom period, which goes from mid summer to early fall and sometimes even to the first frost.

            The kopper king will thrive in full sun but can tolerate some light shade. To produce sturdier stems and the best flowers, make sure to plant it in medium to wet soil with good air circulation – this will also help the plant to be stronger and better at resisting diseases. This perennial is susceptible to wind burn so be sure to plant it in a protected area to minimize its risk. Once established, the kopper king does not like to dry out, deep and consistent watering will help to ensure a happy healthy plant! When the flowering season is completed in late autumn, you can prune the stems back 3 to 4 inches to allow for new growth in the spring – this perennial will also benefit from organically rich soils and regular fertilizations during the growing period.

            The kopper king has many uses in the landscape; it can be used as a border, a specimen plant or, for a greater impact, you could use it as a massing plant. Since this plant prefers moist soils, it does very well along streams or ponds and in low or wet areas on your property. This unique plant is the perfect combination of a tropical vibe and a sophisticated appearance. With its beautiful foliage and massive blossoms, the kopper king is a no-brainer when searching for a landscape plant that is a definite head-turner while still being beautifully elegant at the same time. 

Shedding Light on Sunflowers

Things You Didn’t Know About Sunflowers

By: Lauren M. Liff for Dabah Landscape Designs


            There isn’t a flower around that makes one smile more than the sunflower. Known for their bright yellow petals, delicious seeds and incredible height, sunflowers are one of the most popular plants around. Sunflowers are seen in gardens, fields, cut arrangements, paintings and the list goes on – they are obviously very well-known; however, there are some incredibly intriguing facts about this beauty that most people do not know. So let us shed some (more) light on this glorious specimen for you!

            The sunflower or Helianthus, gets its name from the word ‘Helia’ meaning sun and ‘Anthus’ for flower. Its name is also unique as the sunFLOWER is the only flower with the word ‘flower’ in its name! Sunflowers are said to be symbols of faith, loyalty and adoration; they clearly adore the sun as they use a process called heliotropism. Heliotropism is a plant process that causes the plant to follow the movement of the sun across the sky.

            Aside from providing satisfying seeds for people and wildlife, sunflower oil has also proved to be very useful for a number of purposes. Sunflower oil can be used to soften leather, as a hair conditioner, a cooking oil and can even soothe wounds. The oil can also be used as an organic component in bio-diesel fuel. It also has been used in animal feed as the sunflower oil is very rich in calcium and iron as well as containing vitamin A and vitamin D.

            One of the most noticeable characteristics of the sunflower is of course its height. They are one of the fastest growing plants and to say that they grow tall is an understatement. On average the sunflower can grow up to 8-12 feet within a six-month period! The world record for the tallest sunflower was set in the summer of 2014; Hans-Peter Schiffer of Germany grew a sunflower that reached a height of 30 feet 1 inch! This sunflower was so tall that it even required its own scaffold! Aside from the height of the plant itself, the sunflower blossom is known to be quite large as well. Measuring from the tip of the outer petal on one side to the tip of the outer petal on the other side, the largest sunflower head on record was grown by Emily Martin in British Columbia in 1983. This massive flower head measured 32 ¼ inches in diameter!

            Speaking of their flower heads, did you know that the sunflower is actually not just one flower, but is actually made up of thousands of smaller flowers? The yellow outer petals do not reproduce but the florets in the center (where you find sunflower seeds) have both male and female sex organs and can self-pollinate. Reproduction can also occur by the pollen being dispersed by the wind or traveling with nature’s pollinators. Even when the seeds are gone the sunflower still has a use! Believe it or not, the sunflower head can be used as a disposable scrubbing pad. When your household scrubbing tools just aren’t cutting it, the sunflower head is sturdy enough to get the job done.

            It’s clear to see that sunflowers are more than just aesthetically pleasing and agriculturally delightful. They are so much more than meets the eye! If you are looking to grow the next world’s tallest sunflower, make sure you grow it from seed and pay attention to the variety as each one can reach different heights. If you don’t need the height but still adore the plant, be sure to plant it in full sun and well drained soil. With sunflowers in your garden you'll be able to make yellow dye or homemade soap; you could scrub your kitchen, chow down on the seeds or simply just enjoy this absolutely glorious plant that, no matter how down you're feeling, will always make you smile.

Sunflower-Meaning.jpg

The 'What' and 'How' Behind Landscape Design

Landscape Design: More Art than Science

By: Lauren M. Liff for Dabah Landscape Designs


            Almost everyone can appreciate a well-designed landscape but chances are that most of them believe that landscape design is merely putting plants in the ground. Truth is, landscape design is so much more than it appears to be. As landscape designers it is our duty to explain to you what exactly landscape design is and what it entails. Landscape design is an art form; it is where nature, culture and vision are combined to transform a property into a functional, creative and beautiful outdoor space.

            To put it simply, landscape design is the practice of putting together a plan that best utilizes an outdoor space in the most beautiful way. Designing a property takes time, energy, imagination, creativity and lots and lots of planning. Landscape design is broken down into two categories: softscapes and hardscapes. Softscapes encompasses all of the plant materials used in the landscape whereas hardscaping pertains to the stonework that is implemented into the design (such as rock walls, walkways, patios and more).

            There are 4 main principles when it comes to landscape design: proportion, order, repetition and unity. Proportion refers to the size of an object in relation to others in the landscape – this is more commonly used when implementing hardscapes into the design. Orders refer mainly to organization and balance in the landscape; this is very important when designing a space with plant materials. Repetition is used to create a familiar pattern and feel to the landscape – a landscape designer will repeat the use of certain plant materials or elements throughout the design. The last principle is unity; this refers to the flow of the landscape. Landscape designers want to ensure that all materials used in the project work together to create a theme, style or specific atmosphere that best reflects the clients’ personality and vision.

            Landscape designers are professionally trained to apply their extensive knowledge of space theory, design principles and the “right plant, right place” concept to best utilize any outdoor space. “Right plant, right place” refers to choosing the correct plant material for the specific site conditions. Soil conditions, amount of sunlight, drainage conditions, wildlife and watering practices are just some of the things that are taken into consideration when selecting the plant material for a project. Landscape designers have an extensive horticultural knowledge base, making them the “go-to” plant experts. Where a plant should be placed, how it should be maintained and how to manage pests and diseases are only a few of the questions professional landscape designers can easily answer.

            Aside from the aesthetics and horticultural knowledge – to ensure the functionality of the design, a landscape designer will take into account the spaces that are used, the clients’ lifestyle and the constantly changing needs of the clients’ home. A landscape designer will use their knowledge and ideas to help a client realize factors that they might not have considered previously. Each project is overseen by the designer, from the initial consultation to the completion of the project – they want to ensure that the completed work exceeds expectation and that the clients’ dream landscape has become a reality.

            When designing an outdoor space, designers take into consideration the clients’ budget and vision, site conditions, amount of usable space and the use of appropriate plants and other materials. Most people rush straight into the installation and construction phase of an outdoor design, without taking these important factors into account. This leads to a project that costs more than what they wanted to spend, more work than they wanted to do and a project that most likely will provide a less than acceptable end result. This is why hiring a professional designer comes in handy; they take all aspects of the job site into account to design and install a breathtaking one-of-a-kind creation. In a time and cost effective manner, landscape designers can transform an ordinary outdoor area into an extraordinary work of art that can last for many seasons to come.

http://apldca.org/what-is-landscape-design/

https://www.landscapingnetwork.com/landscape-design/principles.html

http://cislandscaping.com/what-is-landscape-design-and-why-do-you-need-a-landscape-designer/

How Stone Pavers Can Enhance Your Landscape

Stone Pavers: 4 Benefits of Using Stone Pavers

By: Lauren M. Liff for Dabah Landscape Designs


            Hardscaping has become increasingly popular over the years as people are now starting to realize more the value detailed stonework adds to your home and your lifestyle. Adding stone pavers to your landscape is a home improvement project that will better the aesthetics of your property, improve your curb appeal and increase your overall property value. From an elegantly detailed stone patio in the backyard to a simple walkway to your front entrance, implementing stone pavers into your landscape design can add structure, charm and so much more to your property.

             Using stone pavers in your landscape design is a great way to add detail and character to your property; it will allow you to transform the exterior of your home into a work of art. You can use a high quality material to create an outdoor stone patio and turn your backyard into your own private oasis. You can use stone pavers to create walkways throughout your property or to frame and highlight your garden areas. When an appraiser comes to look at a property, one of the first things they look at is the design and overall quality of the landscape – having stone pavers implemented in your outdoor design will help your landscape better reflect your personality and your lifestyle while increasing your property value at the same time.

            While adding elegance and charm to your property, installing stone paver walkways creates organized paths throughout your property. Having a beautifully designed walkway will also allow you to maneuver safely throughout your property. By creating a permeable walkway surface, you will significantly reduce the amount of standing water throughout your yard. The water will flow though the base of the pavers to the ground below providing a less slick pathway and a better route for the water to drain from your property. 

            The first thing a potential homebuyer is going to notice when they pull up to your property is its’ curb appeal. Adding stone pavers into your outdoor design is a surefire way to significantly enhance your homes curb appeal.  Using stone pavers in the landscape can allow you to highlight and give definition to your garden areas or make your entry way more enticing and more welcoming to your friends and family. Implementing a hardscape design in your landscape can completely transform the feel and look of your property in all the right ways.

            When it rains, the flat areas throughout your property turn into mini ponds and large driveways can create major runoff issues. With stone pavers installed on your property, the water will be directed and controlled, reducing the risk of standing water and potential flooding. When stone pavers are properly installed, the ground is pitched away from the house and surrounding garden beds; by directing the water away from the foundation of the property you are avoiding any potential damage rising waters could cause.

            The installation of stone pavers, whether in a patio or in a walkway, is a wonderful and affordable way to increase you’re the charm, value and safety of your property. The exterior of your home is just as important as the interior and should reflect the same elegance and personality as such. When the reasons we just discussed are taken into consideration, its funny that such a small home improvement project could make that much of a difference; the end result will be a landscape you, your friends and your family can enjoy for years to come.  


http://www.raymondlawnservice.com/Philadelphia-Landscaping/4-ways-stone-pavers-can-enhance-your-homes-landscape/

Asclepias tuberosa: The Butterfly Weed

Butterfly Weed: The Monarch Magnet

By: Lauren M. Liff for Dabah Landscape Designs

            It’s quite easy to imagine how the butterfly weed earned its name. Asclepias tuberosa is a beautiful perennial with nectar and pollen rich flowers that attract tons of beneficial insects and pollinators including hummingbirds, bees and yes, you guessed it, hordes of butterflies! This beautiful perennial produces unique clusters of blooms all summer long and they range in color from bright orange to yellow and red. Being that the butterfly weed is a North American Native, it is fairly easy to grow and once established, requires little effort in terms of maintenance.

            Cousin to the milkweed, butterfly weed plants typically reach heights between 12 and 36 inches. The brightly colored blooms sit atop fuzzy green stems surrounded by lance-shaped leaves. Although it is related to the milkweed, this species does not have the milky-sapped stems as the other milkweeds do. This beauty normally grows wild in meadows, open woods, prairies, fields and along roadways however it has enormous garden bed potential. For garden use, they look fantastic when planted in wildflower meadows, garden borders, rock gardens and even as a mass planting in a perennial bed. They require full sun and will thrive in sandy or rocky soil; once established, the butterfly weed is also drought tolerant.

            When planting the butterfly weed, make sure to put it in its permanent place in your garden as the roots are long and very sturdy making transplantation incredibly difficult. Once planted, keep the soil moist until the butterfly weed is established and starts showing new growth – after that it requires occasional water (but keep in mind, it does prefer dry soil). When pruning your butterfly weed, you can trim old growth every spring to keep it happy and healthy. Do not fertilize this perennial as it might actually do the opposite of what is intended and harm the plant. The butterfly weed is susceptible to mealybugs and aphids however these can be easily controlled with insecticidal soap or horticultural oil.

            In the fall, the flowers give way to spindle-shaped seedpods, which are admired when cuttings are used in arrangements of dried flowers. The butterfly weed is self-seeding unless the seedpods are removed. The pods split open and the silky-tailed seeds are dispersed by the wind. An interesting fact about this perennial is that aside from going by the name “butterfly weed” it is also referred to as pleurisy root due to the fact that the plant roots were previously used for medicinal purposes to treat lung inflammations. 

            Asclepias tuberosa will obviously work famously in a butterfly garden. Not only do the blooms provide nectar and pollen, but also the thick leaves are perfectly designed for chrysalis formation. To start a butterfly garden, plant your butterfly weed alongside Coreopsis, Echinacea and butterfly bush (to name a few). Throw in a birdbath to provide water and some large rocks to give the butterflies a spot to catch some rays and before you know it, you will have your very own backyard butterfly sanctuary!


https://www.gardeningknowhow.com/ornamental/flowers/milkweed/growing-butterfly-weed.htm

http://www.missouribotanicalgarden.org/PlantFinder/PlantFinderDetails.aspx?kempercode=b490


Your Hydrangea isn't Blooming? Here's Why!

Question and Answer: Why isn’t My Hydrangea Blooming?

By: Lauren M. Liff for Dabah Landscape Designs

            Hydrangeas are one of the most popular flowering shrubs used in a typical New Jersey landscape due to their beautiful color variations, attractive foliage and of course their unique flower heads. However, one of the most frequently asked questions when it comes to these plants is: “why isn’t my hydrangea blooming?” The reason behind whether or not your hydrangea is blooming depends on what variety you have as some of them will grow flowers on old growth, where others will grow their flowers on new growth. Let’s get to the bottom of this dilemma so you won’t have to ask: “why isn’t my hydrangea blooming?” anymore!

            There are six common types of hydrangeas commonly seen in North American gardens: Bigleaf, Panicle, Smooth, Climbing, Mountain and Oakleaf. It’s always important to know if the variety of hydrangea that you have blooms on new wood or on old wood – knowing this detail effects when to prune your hydrangea. Incorrect pruning habits are one of the main reasons behind hydrangeas not blooming. 

Bigleaf

Bigleaf

Panicle

Panicle

Smooth

Smooth

Climbing

Climbing

Mountain

Mountain

Oakleaf

Oakleaf

            The Bigleaf hydrangea seems to be not only the most commonly purchased hydrangea but also the one that seems to raise the most concerns when it comes to blooming.This species is a little confusing because it creates a lot of cultivars that can die back to the ground especially when there is a harsh winter – since they bloom on old wood, you can see how this might cause a problem. However, it is also possible that you’ve selected a variety that doesn’t do particularly well in your zone. You can help your hydrangea by protecting it in the winter, for example by mulching around the base of the plant to cover the root zone.

            Another reason as to why your hydrangea won’t bloom is the possibility that you pruned it too far back the year before. If hydrangeas are over pruned in the summer they will die back farther than they usually would leading to a skipped year of blooming. The safest way to avoid this issue is by only pruning your hydrangea in early spring – that way it is easy to differentiate between old wood and new wood. You should pay attention to what kind of hydrangea it is and how far back it died the previous year, that way you will know what and how much to prune back.

            Over fertilization can also cause hydrangeas not to bloom. You can take a soil sample for testing to find out when you fertilized last and what levels of nutrients are in the soil. The soil having too much nitrogen or not enough phosphorus could cause the hydrangeas not to bloom. Nitrogen is the nutrient responsible for lush green growth; too much nitrogen means a very thick green plant with little to no blooms.  Phosphorus aids in the fruiting and flowering of the plant, therefore the less phosphorus there is in the soil, the less blooms you will have. You can help correct this by adding a phosphorus-rich fertilizer or bone meal to the soil.

            Hydrangea blossoms are incredibly showy and beautiful to say the least. So when your hydrangea isn’t blooming it is quite easy to notice. Even though this is a very common concern among hydrangea admirers, it is a solvable problem. By following the suggestions that we have mentioned in this article you can aid your hydrangea in staying happy and healthy and pushing out those absolutely stunning flowers.


https://www.provenwinners.com/Hydrangeas-Demystified

https://www.gardeningknowhow.com/ornamental/shrubs/hydrangea/hydrangea-not-blooming.htm

.sqs-block-content h1 { font-size: 80px !important; }