Soil Amendments: How to Improve Your Soil

By: Lauren M. Liff for Dabah Landscape Designs
Now that you’ve done your at-home soil pH and texture tests, let’s talk about how we can improve your current soil conditions. The healthier your soil is, the happier your garden plants will be – the amendments you make to your soil of course will depend on what type of soil you have. Using the results from your soil tests we can figure out how to adjust the pH level and how you can improve issues like drainage or lack of organic material.
As we discussed in the soil test post, there are 4 main types of soil: loam, clay, sand and silt. IF you have loamy soil then there isn’t much you need to do in terms of amending it – just simply keep doing what you’re doing, but regular applications of compost or other organic materials will help your soil to maintain this texture. If you have mostly clay soil, your available nutrients are plentiful however you struggle with drainage – leaving your plants sitting in water. If you have mostly sandy soil, the presence of available nutrients is most likely pretty low and you struggle with water retention as it drains far to quickly. If you have silty soil, it tends to get slimy when it’s wet and drainage is a concern but the presence of available nutrients is high.
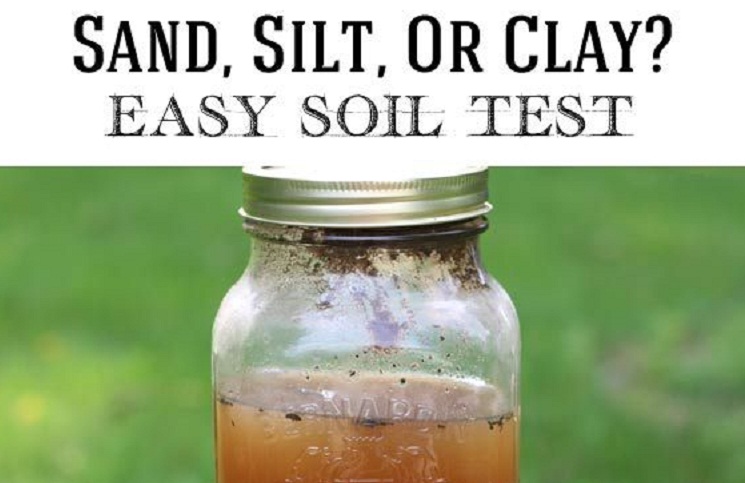
Looking at your soil textural triangle, or the jar from your DIY soil test, you can tell which particle is most predominant. Improving your soil does take time and can be difficult but it is possible by taking the proper corrective measures and with the use of the right amendments.

For sandy soils:
1. To help with water retention you can use well rotted manure or compost (grass clippings, humus and leaf mold as well) – these will increase your soils ability to retain water, they also will work the fastest.
2. You also have to keep an eye on salt levels – if you have a seaside garden then chances are your soil already has a pretty high sale content – in this case make sure you are only using plant based amendments such as plant based compost or sphagnum peat (they have the lowest salt levels).
3. The nutrient content in sandy soils tends to be low, you can test your soil to see what nutrients are lacking and use fertilizer to address those concerns accordingly.
For silty soils:
1. With silty soils your concerned with drainage and the fact that the roots are not receiving the optimal amount of oxygen. You can use composted manure or vegetable matter or ground/aged pine bark to improve the aeration and drainage.
2. Apply 2 to 4 inches of the organic material and work it into the soil about 8 to 12 inches down (into the root zone) for best results.
For clay soils:
1. Use compost or other materials that will compost quickly (such as well-rotted manure, leaf mold and green plants) Apply 3 to 4 inches of the organic material on the soil and gently work it into the soil, go down about 4 to 6 inches.
2. Pay attention when watering your plants, if your soil is mostly clay the water will sit on the soil and some plants can’t tolerate wet feet.
3. Builder’s sand and gypsum will also help improve the drainage and break up some of the compaction – make sure you use course sand rather than fine sand because that will only make things worse.
4. Core aeration will also assist in breaking up the compaction by pulling out tiny plugs of dirt that will sit on the ground and disintegrate naturally.
After completing the DIY soil pH test, you now have a rough idea of what the pH level of your garden soil is. There are two options when it comes to addressing soil pH levels: you can either use plant material that thrive in acidic or alkaline soils (depending on your results) or you can use amendments to lower or raise the pH level. Most plants do well in soil with a pH level between 6.0 and 6.5. Adding organic material to your soil is helpful in adjusting the pH level as well because it acts as a buffer – protecting your soil from becoming either too acidic or too alkaline. But there are other amendments you can use to further adjust the pH level of your soil.
Lowering the pH level:
1. If your soil is too alkaline, the phosphorus in your soil will be less available to your plant materials resulting in less fruiting and flowering.
2. Using organic matters to address this concern is going to be your best bet – composted manure and vermicompost will release the phosphorus that is tied up in your alkaline soil- the use of pine needles as mulch will also naturally increase the acidity in the soil.
3. Sulfur can be used to lower the pH level in your soil and make it more acidic. This is the product used for turning hydrangeas that beautiful bright pink color.
4. Sulfur should be applied using the same method as lime – read the label and follow the directions. If you are using sulfur to increase the acidity in your soil, I have found that working it into the soil is the application method that shows the best results.
Raising the pH level:
1. Lime is typically used to raise the pH level of garden soil to make it more alkaline – make sure to read the label and follow the directions. Adding too much lime to your soil can be incredibly difficult to correct; it’s best to start on the lighter side.
2. You can use powdered or pelletized lime for this application; mix it in to the top layer of the soil or sprinkle it on top and water it in. In my experience pelletized lime is easier to work with and watering it into your soil, allowing it to work gradually, seems to have the best results.
3. Before doing a lime application you want to check the magnesium content in your soil as lime will increase those levels. Too much magnesium in the soil will restrict the nitrogen availability for your garden plants.

Amending your soil texture and pH level will greatly improve the health and happiness of your garden plants. The texture and pH level of your soil will effect the availability of the soil nutrients that plants need to grow and flourish – freeing up or adding to these nutrients will help your plants to grow to their fullest potential. Soil is obviously a key element when it comes to the health of your garden – so just as you tend to your plants, tend to your soil as well. Help your garden be all that it can be!