
Testing Your Soil: Texture and pH Level
By: Lauren M. Liff for Dabah Landscape Designs
The soil in your garden is extremely important to your plants: it provides nourishment during the growing season, protects the roots in the winter and allows them to grow and reach their full potential. Testing your soil regularly can help ensure that the plants in your garden are happy and healthy year round. Knowing what type of soil is in your landscape and knowing the pH level of that soil is more important than most people would think. The pH level of your soil effects what nutrients are present and how available they are for your landscape plants. Although soil tests are usually inexpensive, it does require money nonetheless – not to mention time to receive your results. In this article I’m going to explain a step-by-step method to test your soils pH level and texture without a kit. With this DIY soil test you’ll be able to learn what amendments you need to make to provide your plants with a healthy soil environment and allow for maximum plant growth.
The pH level of your soil is key; when the pH level rises, nutrients like phosphorus and iron (for example) become less available. When the pH level drops, you run the risk of your soil becoming toxic and causing harm to your plant material. Each plant has a preference in terms of the pH level of the soil; most plants do well in a slightly acidic environment with a pH of 6.0 – 6.5. Some plants however, like hollies and azaleas, thrive in a more acidic environment. Knowing the acidity level of your soil will help you to identify and fix any deficiencies that may be present. This DIY pH test is very simple: all you need is vinegar, baking soda, distilled water and of course, soil!

Step 1: Collect 1 cup of soil – for the most accurate results collect samples from different spots in your garden. Try to dig at least 6 inches down to collect your samples.
Step 2: Mix your soil samples together thoroughly; get two empty containers and put 2 teaspoons of your soil sample into each container
Step 3: Add a ½ cup of vinegar to one of the cups of soil
**If the mixture starts to fizz then you have alkaline soil – a pH between 7 and 8**
Step 4: Add distilled water to the other container of soil – enough to make the soil muddy
Step 5: Add a ½ cup of baking soda to the muddy mixture
**If the mixture starts to fizz then you have acidic soil – a pH between 5 and 6**
**If your soil doesn’t fizz at all in either container then the soil is neutral with a pH of 7**
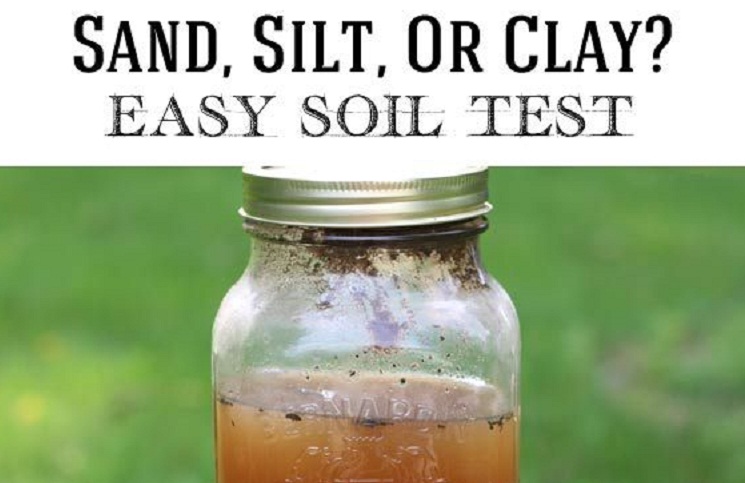
Now that we know roughly the pH level of your soil, let’s take a look at the soil texture. Soil is made up of 3 main components: clay, sand and silt. Knowing the texture of your soil will show you how your soil absorbs water and what you will need to use to amend it (compost, mulch, or manure for example). The ideal mix of these 3 components would be: 20% clay, 40% silt and 40% sand – this would be considered a loam soil which is the ideal soil texture. All you need for this soil texture test is a clean jar with a tight lid (a pint or quart mason jar works the best), water, dish soap and soil.
Step 1: Collect soil samples from your garden (if you did the pH test you can use the leftover soil) – and using a mason jar, fill it halfway with soil.
Step 2: Fill the jar with water so that it is about ¾ full then add in a teaspoon of liquid dish soap.
Step 3: Tighten the lid and shake the jar for several minutes to mix up the particles.
Step 4: Put your jar aside and let it sit for several hours to give the particles time to settle
Step 5: Use the soil textural triangle to calculate your gardens' soil texture

The particles will separate into layers: the heaviest particles will sink to the bottom – this will be the sand layer, next will be the silt layer, and on top will be the clay particles. Any organic matter in the soil will float to the top of the jar. The color of the soil itself will tell you about the organic matter content of your soil. Lighter soils have less organic matter and darker soils will warm up faster in the spring.
The longer you wait for soil test to settle, the more accurate your reading will be. When I did this test I left my soil sample to sit for just about 24 hours and then took the reading the following afternoon. You can use a ruler to measure your layers: take the measurement of each layer and divide it by the measurement of all 3 layers combined and multiply by 100 to get the percentage. You can use a permanent marker to mark off the layers to make the measuring a bit easier. Once you have your percentages, you can use the soil textural triangle (pictured below) to decipher what kind of soil you have; simply plot your percentages on the triangle to find your exact soil texture. Once you have found your soil texture, you will be able to plan a course of action to amend it (if needed).

Based on your soil pH reading and the results from your texture test you will know what amendments need to be made to ensure that your soil is as healthy as it can be for your plants. You can test your soil yearly if significant amendments need to be made or you can test it as needed. If you do decide to test your soil regularly, it’s best to test it in the fall and any amendments you need to make should be done in the spring. These tests are very easy to do and will tell you a lot about your garden; the more you know about your soil, the easier it will be to provide your plants with the healthiest growing environment.


